Rescuing A Little Daisy
I met one of the Australian Plant Society members at the garden that is going to be bulldozed. We had to make an educated guess as to where the damage is going to be done. There are a lot of plants involved in the area.
One of the first and easiest tasks was to dig up a little daisy, Brachsycome formosa.
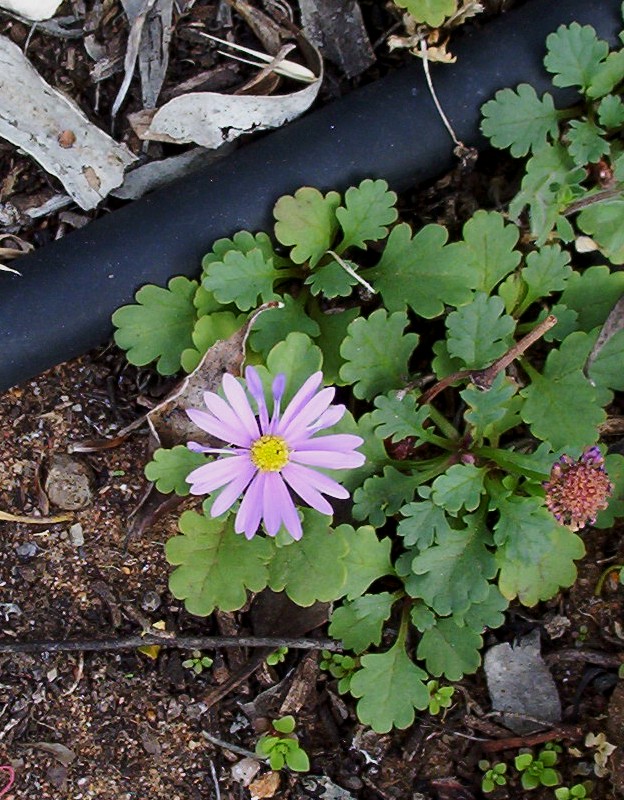
Brachyscome formosa
This is quite a small plant which multiplies by suckering. I have probably not given it the correct name. The Australian Daisy Study Group book on Brachyscomes calls this plant Brachyscome affinity formosa, meaning it is like it (known as Pilliga Daisy) but not quite. This one has a pretty mauve flower whereas Pilliga Daisy is cerise pink. It sends up new shoots away from the original plant. It is remarkably hardy. It survives by dying back during the heat of the summer, reappearing after autumn rains. We found dozens of little plants, some of which we potted with a view to relocating in the garden and others to pot at home as insurance. Considering the low rainfall here, this little plant is worth trying.
.
Make Cuttings To Save Plants
Our local group of the Austarlian Plant Society planted many native plants in a scrub area attached to a retirement village in 1986. This was part of the South Australian Jubilee 150 Celebrations. Many of the plants are rare or endangered. We heard today that a part of the garden will soon be bulldozed to make way for more development in the village. It is a shame this will happen. The garden is part of the amenity available to residents.
As a result of this development we are going to chop the plants in order to take as many cuttings as possible so the plants will not be wasted. The small plants we will attempt to relocate even if we have to pot them first and treat them as large ‘cuttings’.
This garden has been the source for many plants I have raised from cuttings. Many of the plants are only available at Autumn and Spring Plant Sales held by the Australian Plant Society because I have been fortunate in being able to strike cuttings from them.
Potting Mixes For Propagating Plants
One of the most frustrating things about propagating plants and growing plants in pots is finding the right ingredients for potting mixes.
In the previous post Make New Plants… By Taking Cuttings, I mentioned obtaining a propagating mix. I have had to compromise with what is available locally. The basic idea of a propagating mix suitable for cuttings is to have excellent drainage, one that does not compact with watering, and maintains some moisture.
Traditionally, coarse sand mixed with peat moss was used. The difficulty is where does one get coarse sand? One of the potting mix companies now markets bags of coarse propagating sand. Whether you can buy it locally is another matter. Other ingredients readily available are blocks of coco peat (more environmentally friendly than peatmoss), vermiculite and perlite both of which are used in hydroponics. My compromise is a mixture of a reasonable bark based potting mix, coco peat and either perlite or vermiculite, in about equal proportions and moistened.
The main thing to do is to work on a recipe and if it works continue to use it. The most important consideration is to use clean ingredients.
Equally as important is to always mix the ingredients in the open and take care when opening bags of potting mix. Perlite floats. It can be a pest to use. A mask is a good idea as some people have been known to contract Legionnaires disease from dry potting mix floating in the air. Keep potting mix moist rather than allowing it to become powder dry.
No.2 of a series on Propagation
Make New Plants… By Taking Cuttings
18 Comments »20th September, 2006; Category: Propagating
I received an email from a friend who offered her garden to me to come and get some cuttings. With its mixture of exotics and Australian native plants this is the equivalent of offering me a block of chocolate 😀 .
Why take cuttings? Plants like Eremophilas (Emu Bushes) are difficult to raise from seed. If a particular flower colour or plant habit is required, taking cuttings from the plant with these desirable qualities guarantees that the new plant will have the characteristics that are wanted.
This is a great time of the year in South Australia to begin setting cuttings as the warmth stimulates root growth quickly because many plants are in growth mode.
This is basically how I do it.

Gather equipment
- Collect together a suitable clean pot (140-150mm across) with good drainage holes, some freely draining propagating mix, sharp secateurs or snips, some sort of plant hormone powder or gel (from garden centres) if needed, a label and suitable pen, a plastic bag or plastic drink bottle with the bottom removed.
- Fill the pot with the mix within 2-3 cm of the top and firm down gently.
Make cuttings
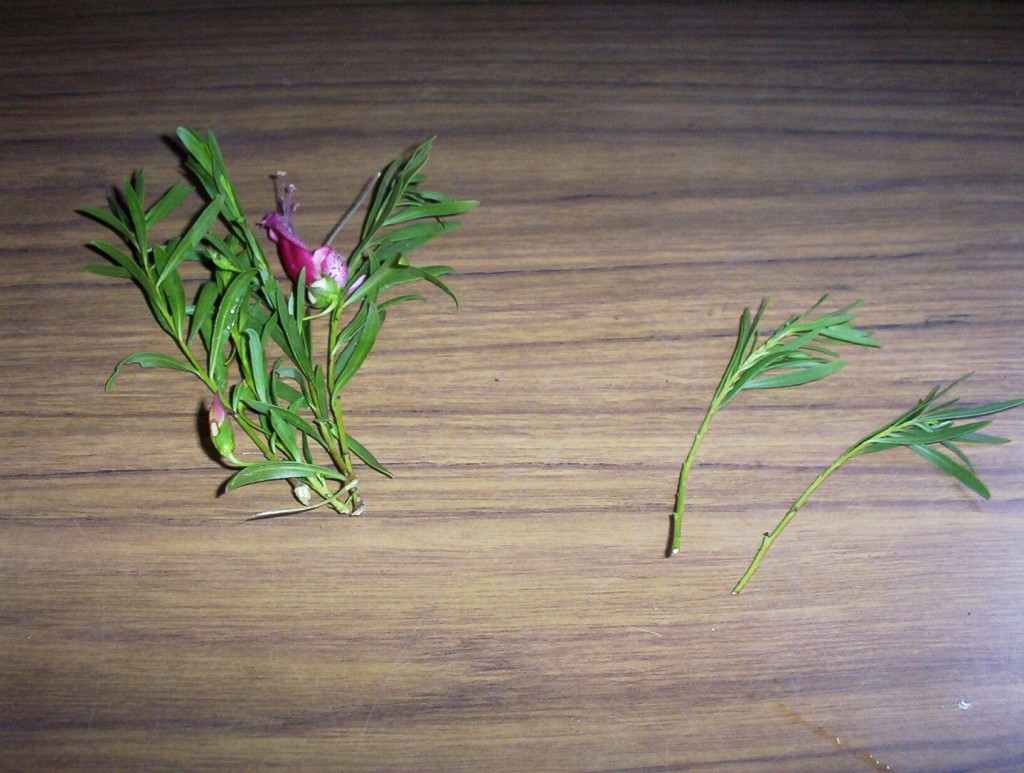
- Collect the cutting material. (I used Eremophila maculata from the bush in the previous post.) Trim it to length (about 10cm long) making a cut immediately below a point where a leaf joins the stem. This point is called a leaf node. Remove the lower leaves on the stem, cut any large leaves in half. Always keep moist by standing in water or keeping it covered with plastic or moist paper.
- Dip the end of the cutting in the plant rooting hormone if using it. (Follow directions on the container.) Roots will grow from this point and sometimes along the lower part of the stem.
- Make a hole 2-3cm deep in the mix with a piece of dowel or knitting needle equivalent and insert the cutting. Firm the mix around the stem.
Set the cuttings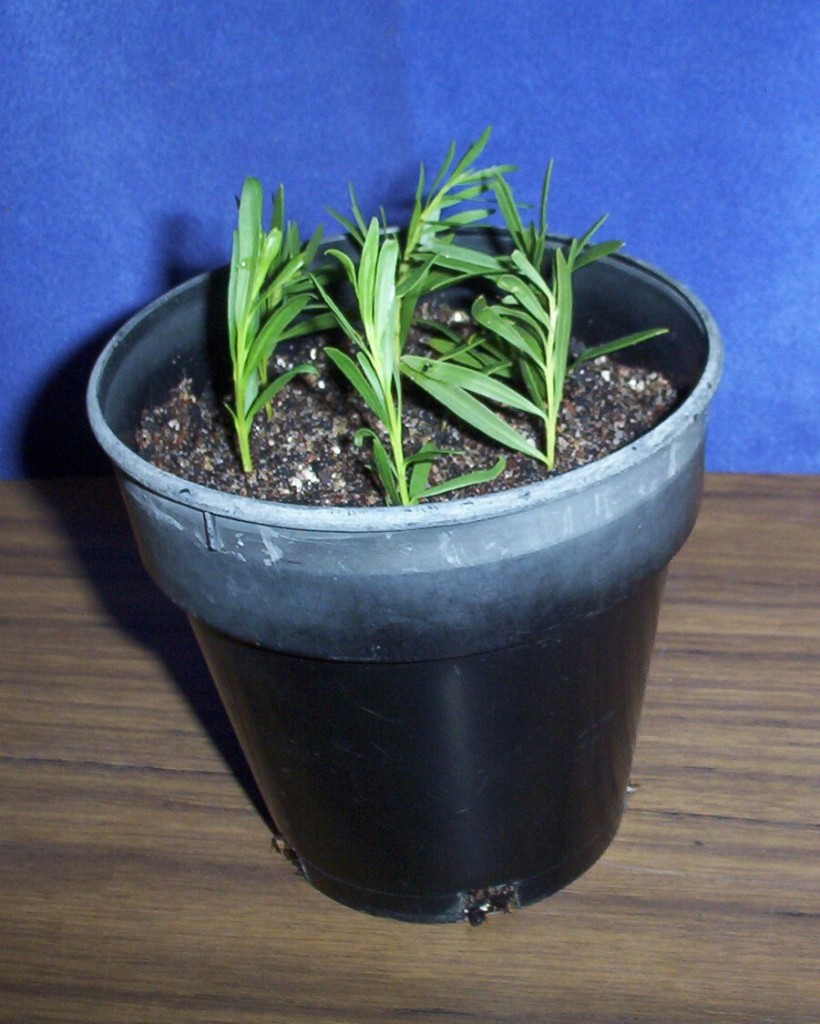
- Several cuttings can be placed in the one pot, suitably spaced so that the leaves do not touch one another.
- Water gently to settle the mix around the stems.
Cover cuttings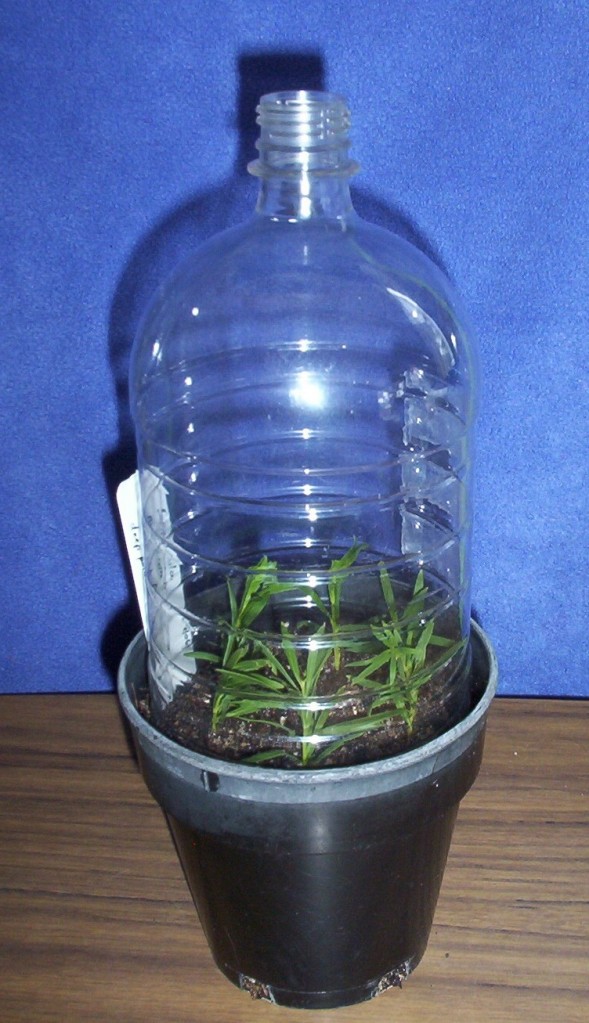
- Place the drink bottle over the top of the cuttings or the pot depending on size, write the name of the plant on the label, where the piece came from and the date and put the lot in a warm spot out of direct sunlight.
- The mix needs to be kept moist not soggy, so watering may be necessary only once a week depending on the ingredients in the propagating mix.
- The cover retains humidity around the leaves of the plant pieces. Small heated propagators can be purchased which make the rooting process occur quicker. A hot house, which I use, is ideal. In this case the extra cover over the cuttings is unnecessary. The idea is to keep the leaves cooler than the mix in the pot. Slight moisture on the leaves achieves this cooling effect much like perspiration does in humans.
- Roots should appear in 3-6 weeks depending on the weather and the type of plant.
Some Australian native plants are notoriously difficult to strike but I never give up entirely. One never knows when success will come.
- This article has been submitted to the writing project “How to…” organised by Darren Rowse at ProBlogger
- More details on the above points in the next couple of posts.
Propagating Acacias (Wattles)
Acacias are generally propagated from seed. Seed can be bought from native seed merchants and it stores well if you collect your own. I have lost some seed to weavils which disgusted me when I opened the bag of seed to find piles of ‘crumbs’ and some very well fed weavils.
Acacia seed has a very hard seed coat. I found it easier to use nail clippers to nick the side of the seed. This needs some dexterity to hold the seed between the fingers of one hand in such a position that the nippers of the nail clippers can actually get at the side of the seed!
However I have had 100% germination from seed that was actually large enough to do this.
Smaller seed I find easiest to abraid gently between two pieces of sand paper. Place one piece of sand paper on a board, the seed on that and use the other piece of sand paper, rough side against the seeds and twist the sand paper back and forth 3 0r 4 times. The seed casing can be seen to be thinner. I have found that too much pressure wrecks the seed like a grinding stone.
Seed is sown and covered to about the depth of the seed. I also use a thin layer of small washed gravel on top of this to prevent the seed from being washed out and to act as a mulch. Seed is best sown in autumn or spring. I had good germination in June this year but was actually saved by the fact that we had no rain.
Some Acacias can be propagated from cuttings. Firm new seasons growth is used.